Module Installation
This page describes how to install the DNNGo PowerForms module on your DNN site.
System Requirements
Before using PowerForms, make sure your environment meets the following requirements:
- DNN platform: DNN 9.8.0 or higher
- Server permissions: superuser (Host) permission
- Browsers: modern browsers such as Chrome, Firefox, Safari and Edge
Installation Steps
Step 1: Log in to the site
Log in to your DNN site with a superuser (Host) account.
Step 2: Open the extensions page
Navigate to Host → Extensions.
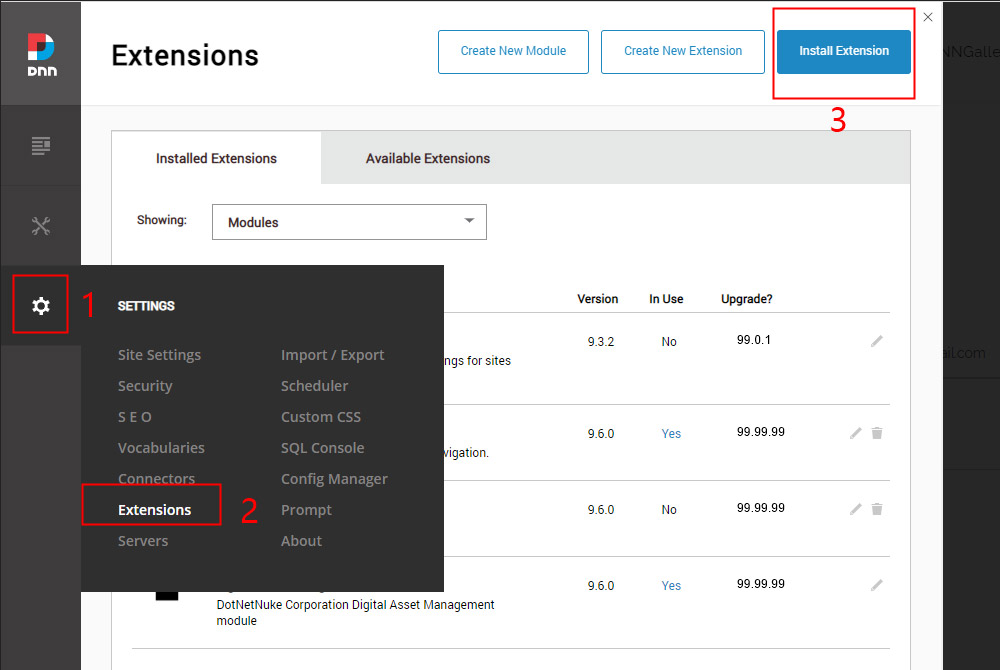
Step 3: Install the package
- Click Install Extension Wizard and hit the Choose File button.
- Find the package
DNNGo_PowerForms_x.x.x_Install.zipon your computer. - Click Next and follow the wizard to complete the upload and installation.
After installation, DNNGo PowerForms appears in the extensions list.
Add the Module to a Page
- Log in to your site with an administrator account.
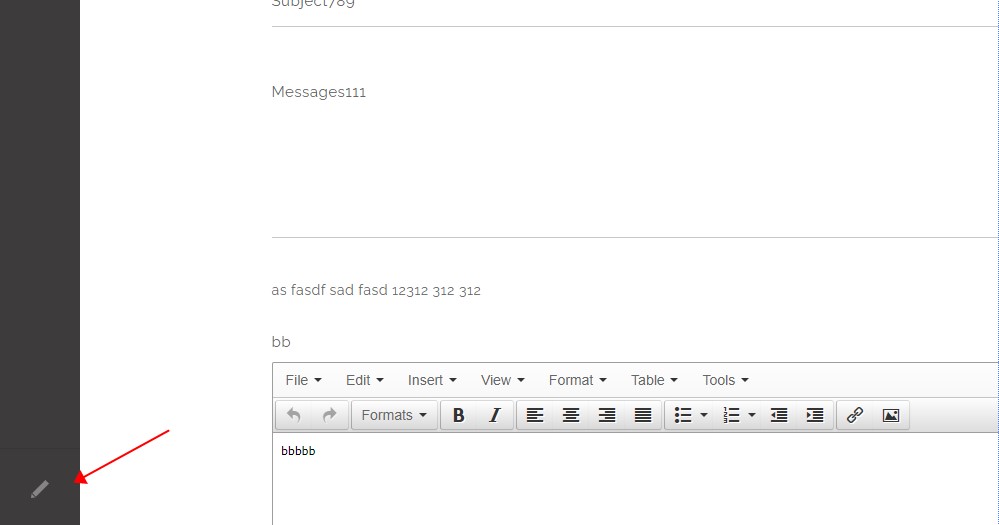
- Click the edit icon at the bottom left of the page to enter edit mode.
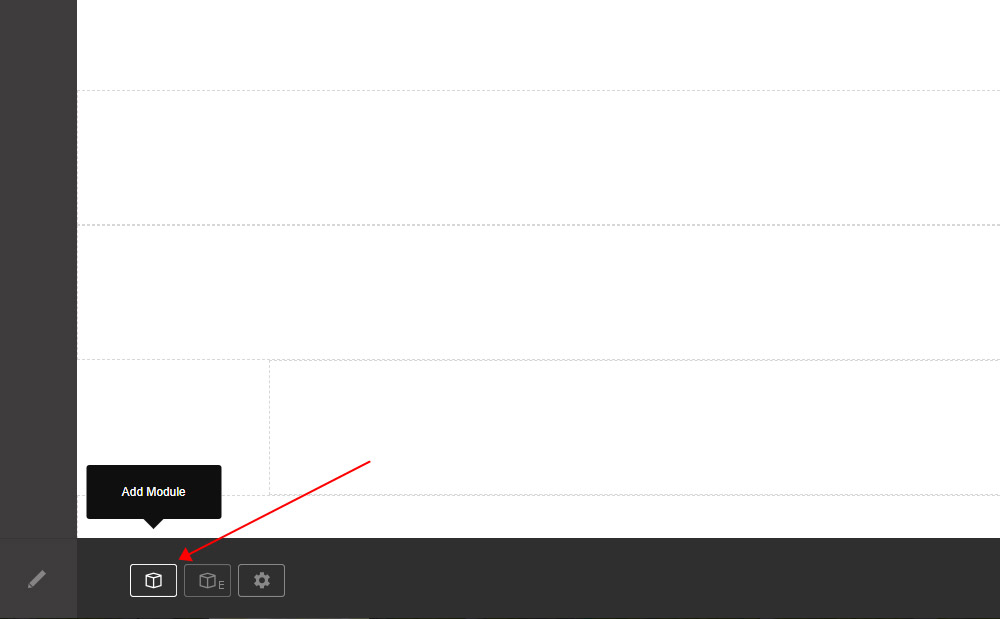
- Click the Add Module button.
- Find the DNNGo PowerForms module in the list.
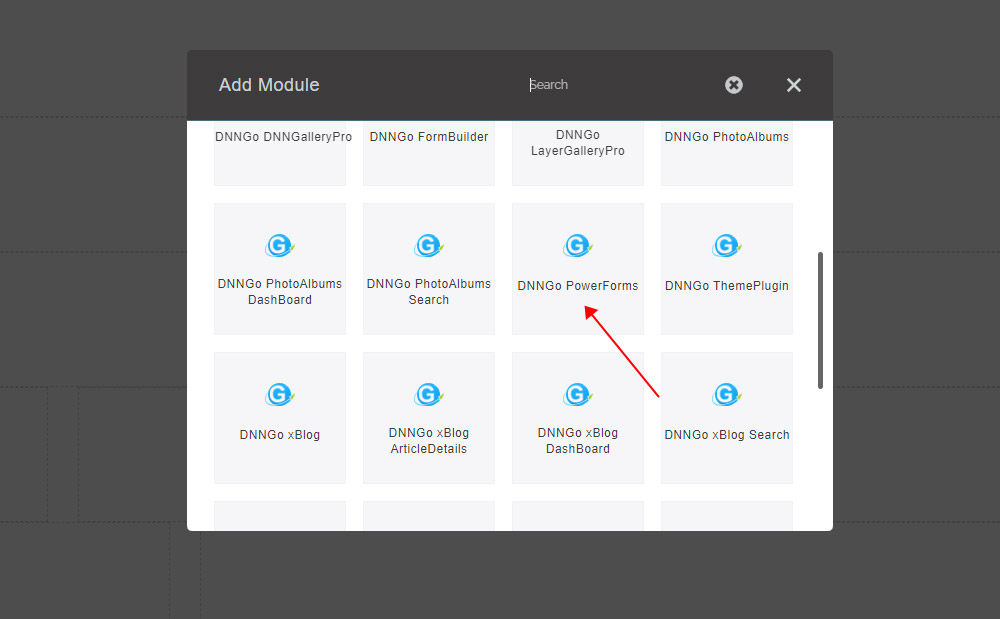
- Drag the module to a pane.
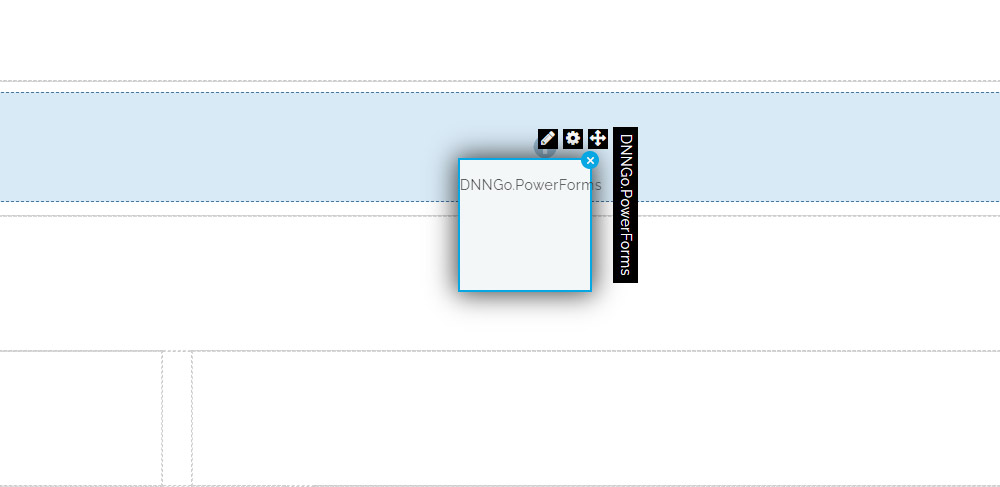
- Once done, click New Field to start adding fields.
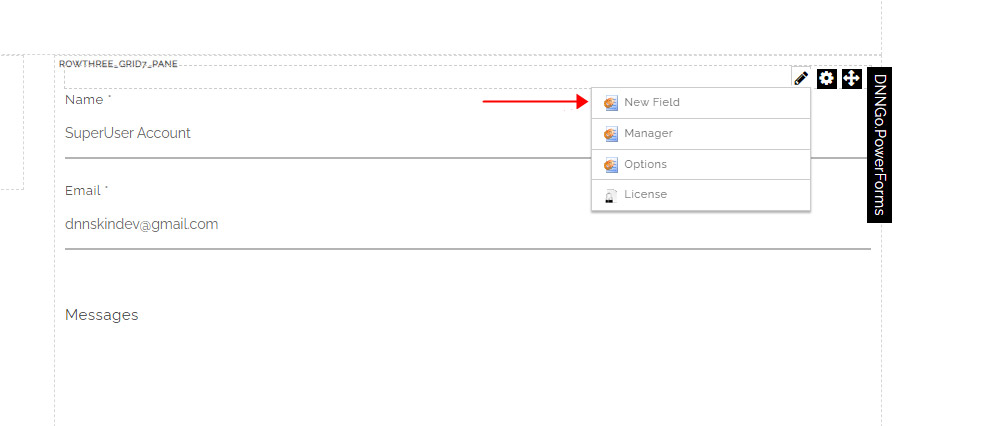
When the module is first added to a page, three default fields (Name, Email, Messages) are created automatically so you can get started quickly.
Upgrading from an Older Version
Simply install the new package over the old version via Settings → Extensions — fields, submission records and settings are preserved. We recommend backing up your field structure with Import & Export before upgrading.
Next Steps
- Activating the License — activate your license to unlock full functionality
- Building a Form — learn how to create and manage form fields