
Installation Guide
Install in this order: DNNGo_ThemePlugin first, then the skin package, and finally the other modules as needed.
Unzip first
Unzip the downloaded archive before installing and pick the install packages from the unzipped folders. Uploading the outer archive directly will fail with an "invalid DNN extension" error.
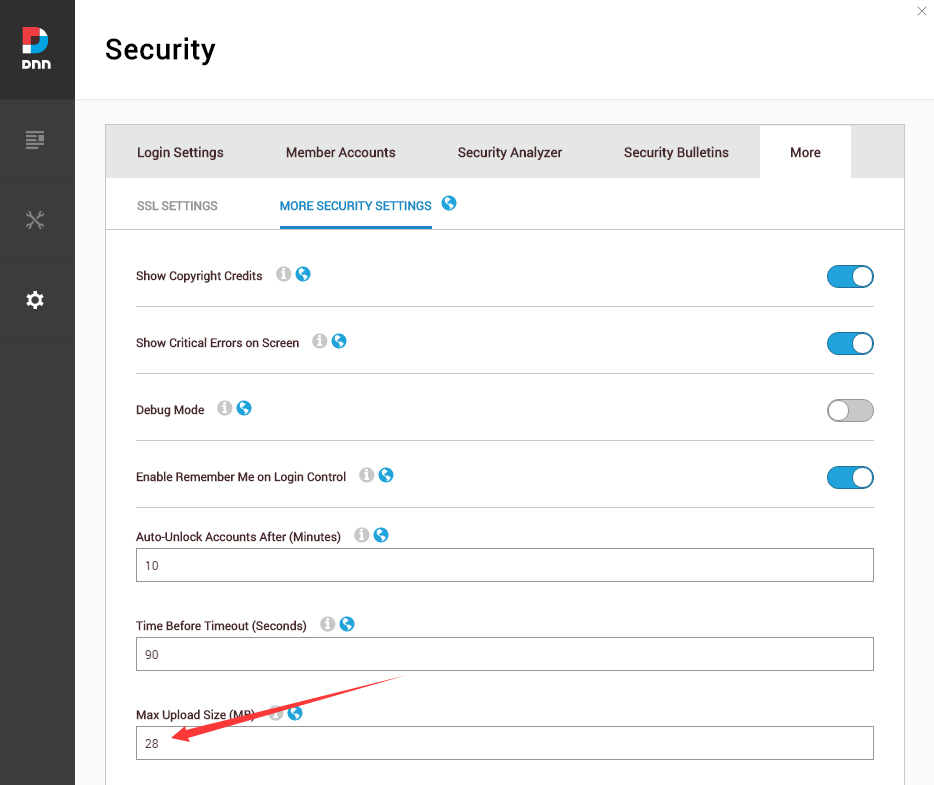
- Go to Settings → Security → More, open the MORE SECURITY SETTINGS tab and set Max Upload Size to 28 or higher.
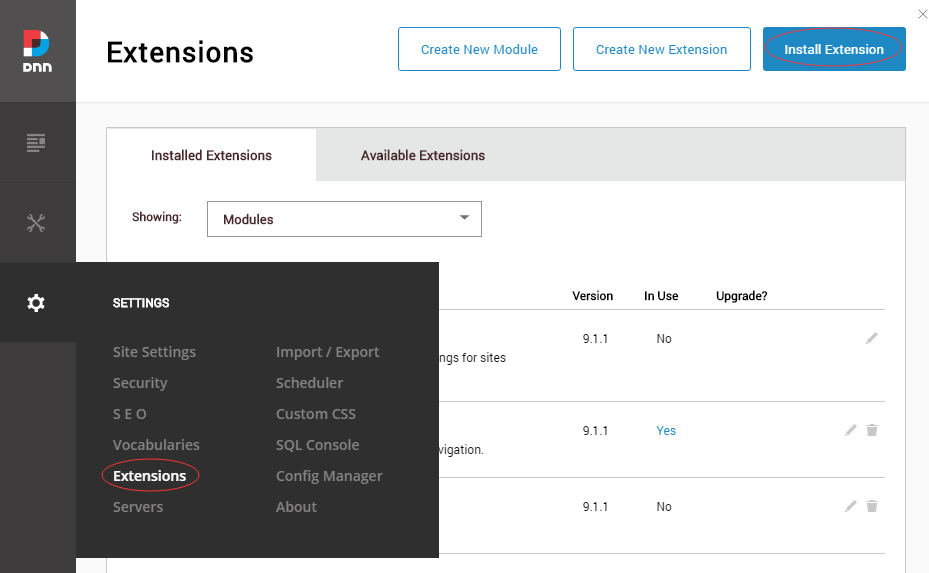
Go to Host → Extensions → Install Extension and first install
DNNGo_ThemePlugin_x.x.x_Release_Install.zipfrom theDNNGo_ThemePlugin Modulefolder.Continue with the wizard to install the skin package
DNN Skins/20073-UnlimitedColorsPack-055-DNNSkins.zip.
Install the other modules as needed (LayerGalleryPro, DNNGalleryPro, MegaMenuAddon, PhotoAlbums, PowerForms, xBlog, xEvent, etc.).
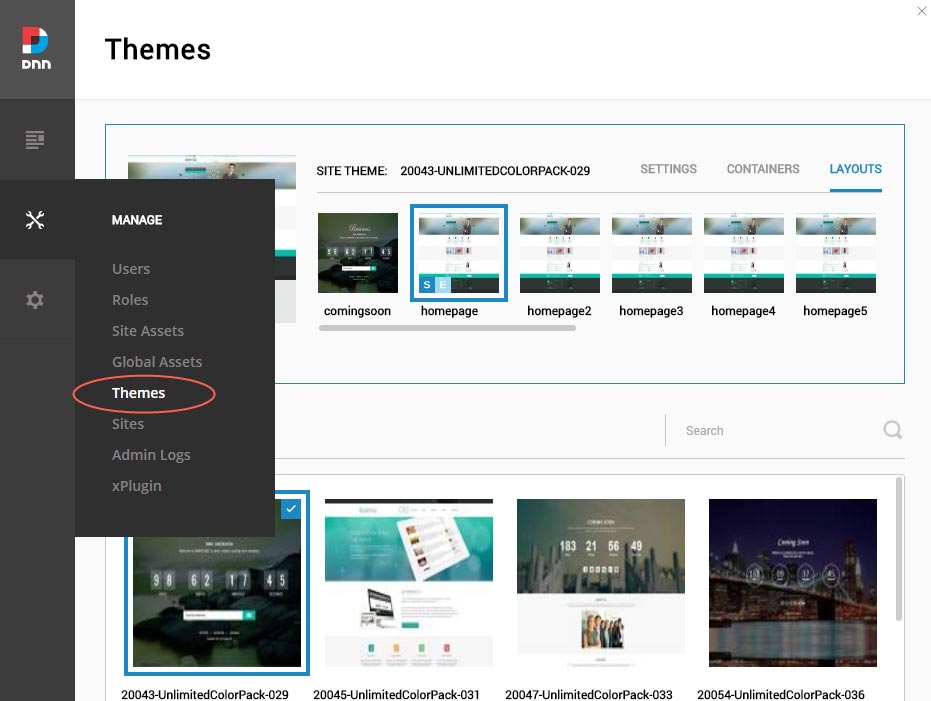
When the installation completes, go to Manage → Themes, select and apply
20073-UnlimitedColorsPack-055.
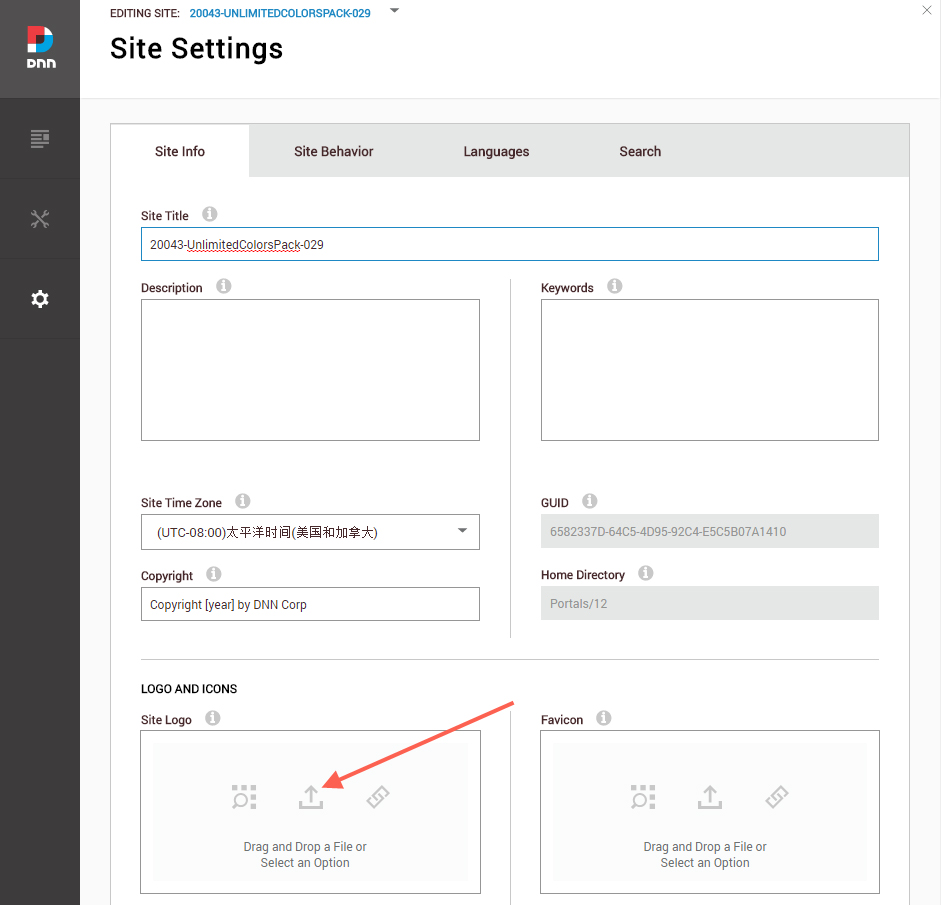
- Upload your site logo on the Settings → Site Settings page. (The skin can also set separate desktop / fixed-menu / mobile logos in ThemePlugin — see Logo Settings.)
Next Steps
- Change the HTML Editor Settings — important for making the short codes save correctly;
- Import Page Templates to recreate the demo pages.