To use skins and modules, you must be running DNN 8.x or higher. We have tested it on DNN 8.x and DNN 9.x.
Installation
What Are The Requirements To Use Skins And Modules
Installation
To install this skin you must have a working version of Dotnetnuke already installed. If you need help to install Dotnetnuke, follow the instructions in Documentation Center.
For DNN 8
Step 1. Log in to your site as super administrator.
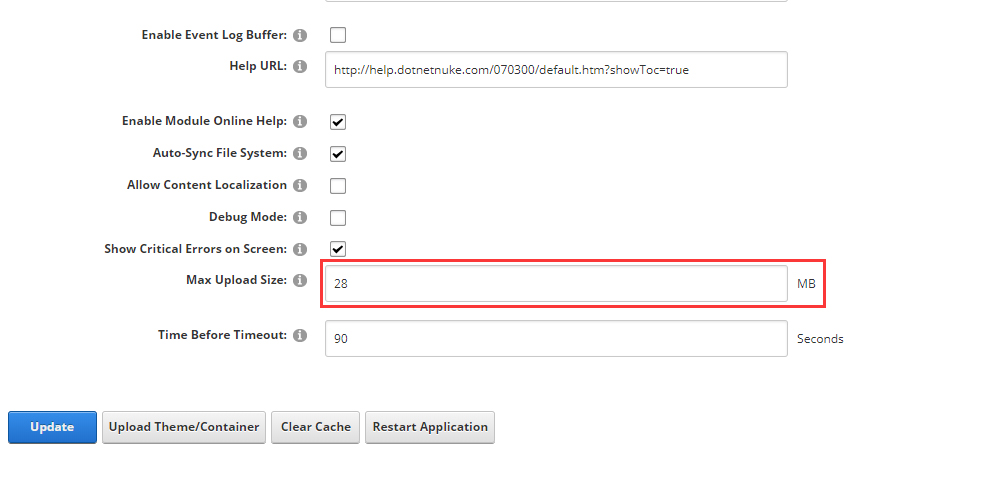
Step 2. Go to Host > Host-Settings, and select the tab Other Settings, changing Max Upload Size to 28 or higher.
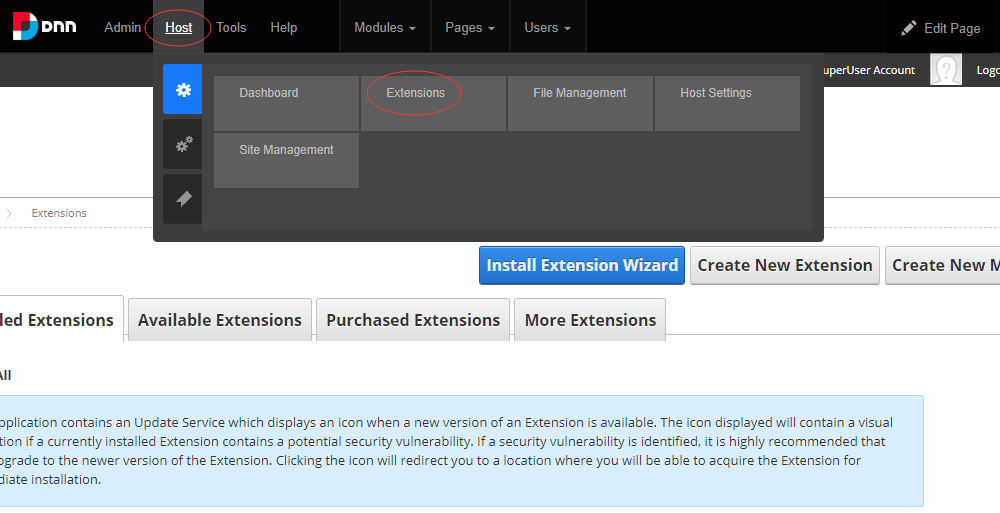
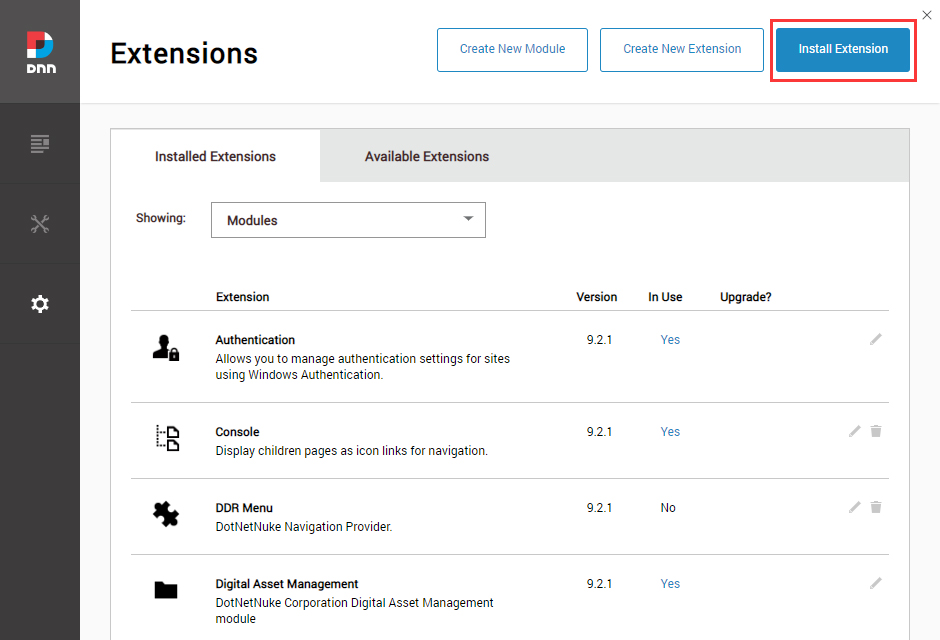
Step 3. Go to Host > Extensions > Install Extension wizard to install the dng-theme-pro_x.x.x_PA.zip, DNNGo_ThemePluginPro_x.x.x.PA.zip and all the modules included in the folder.
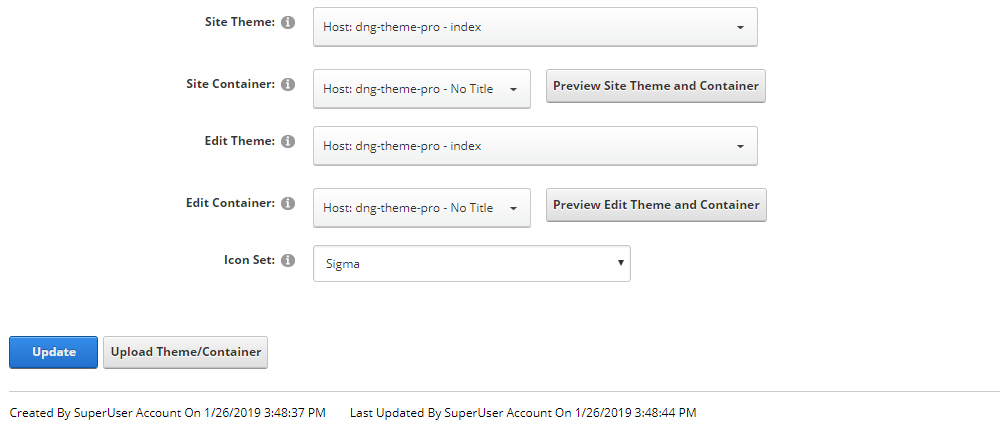
Step 4. After the installation has been completed, navigate to Admin > Site Settings > Basic Settings (tab) > Appearance (section). Specify Site Theme and Edit Theme to be dng-theme-pro – index, Specify Site Container and Edit Container to be dng-theme-pro – No Title.
For DNN 9
Step 1. Log in to your site as super administrator.
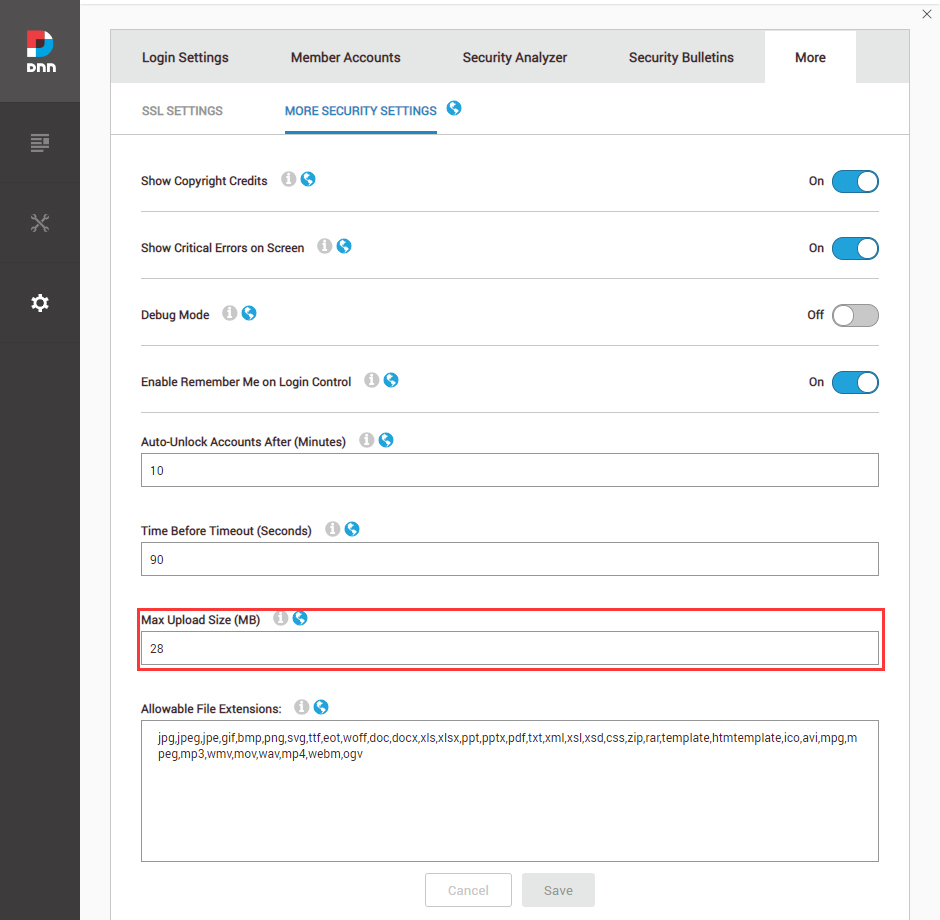
Step 2. Go to Settings > Security > More, and select the tab MORE SECURITY SETTINGS, changing Max Upload Size to 28 or higher.
Step 3. Go to Host > Extensions > Install Extension wizard to install the dng-theme-pro_x.x.x_PA.zip, DNNGo_ThemePluginPro_x.x.x.PA.zip and all the modules included in the folder.
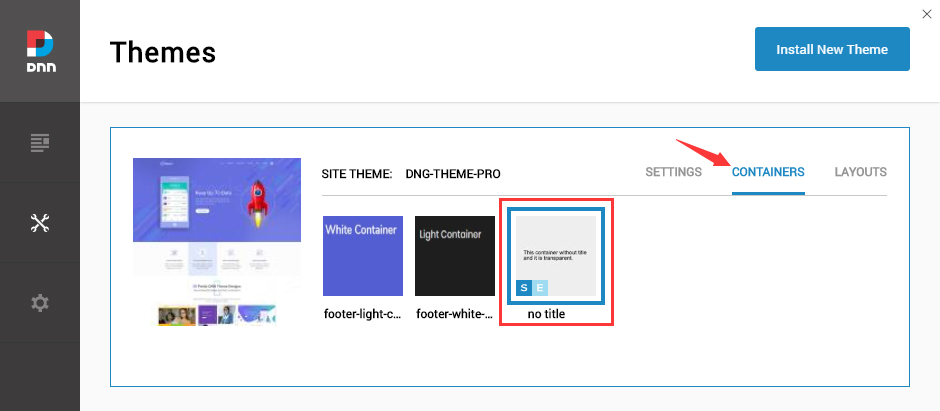
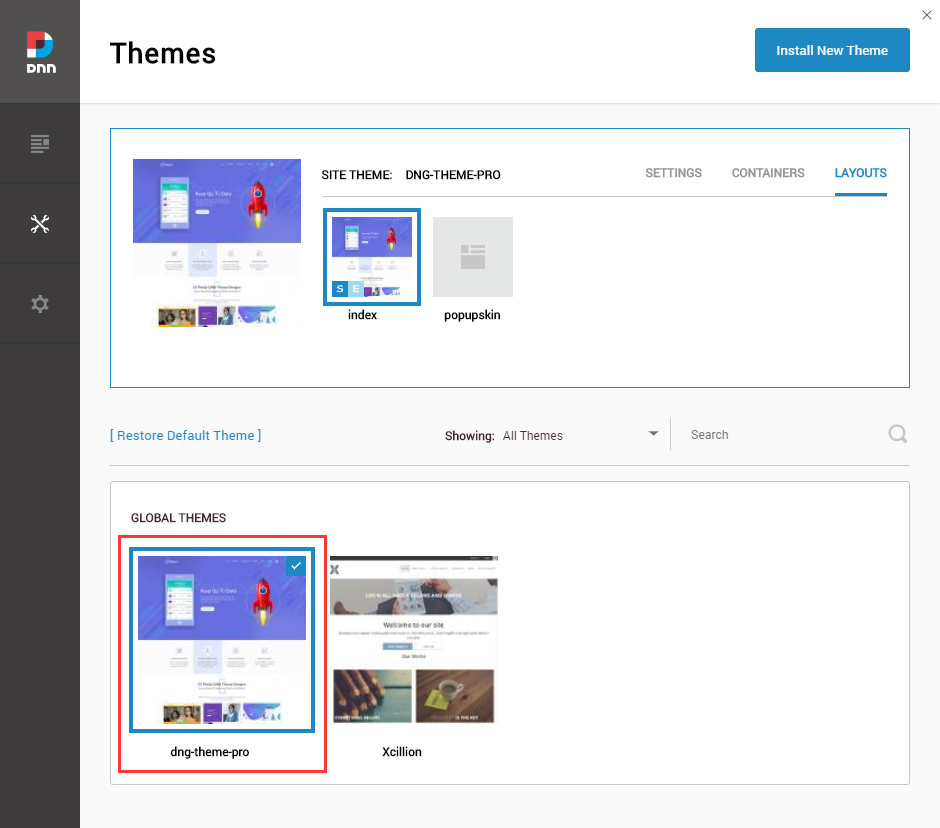
Step 4. After the installation has been completed, navigate to Manage > Themes. Select and apply DNG-Theme-Pro.
Step 5. Specify Site Theme and Edit Theme to be dng-theme-pro – index.

Step 6. Specify Site Container and Edit Container to be dng-theme-pro – No Title.