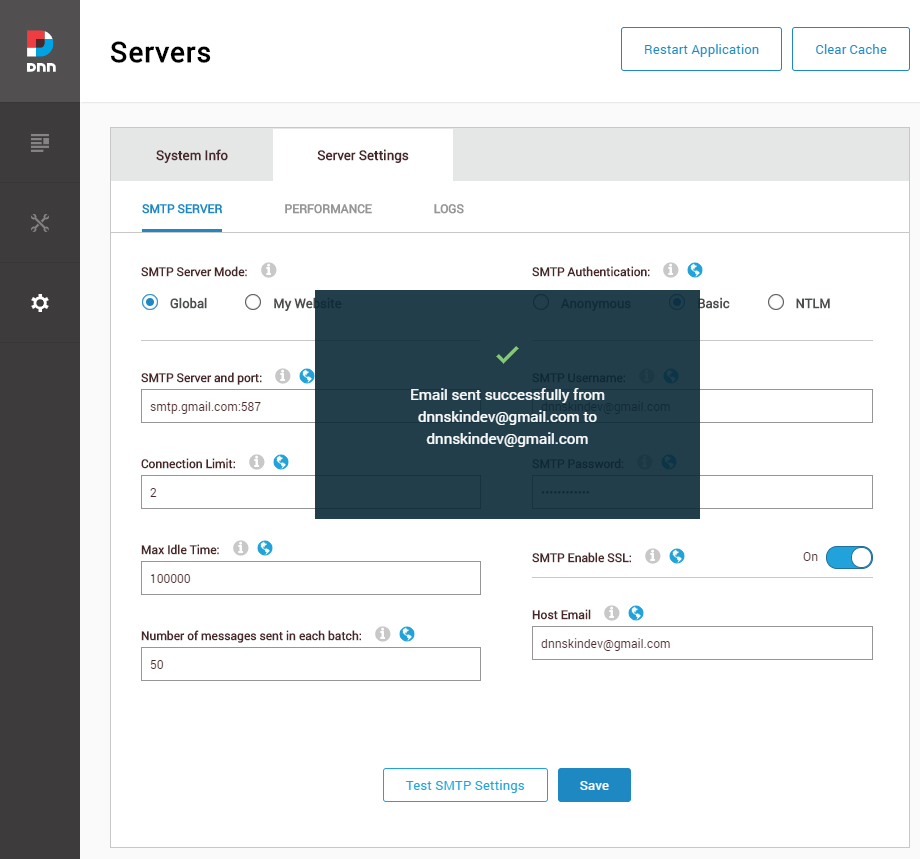
Set Up Forms
Many form styles are included in this theme, such as subscription forms and contact forms. You can check the form demo from this page.
There are 2 parts included in a form. The front-end display part needs to be added with the Content Builder module, while the back-end part needs to be set in the form module (FormBuilder — or PowerForms on older versions).
Newer theme versions
Newer versions of the theme ship with the FormBuilder module instead of PowerForms. The workflow below applies to both; the back-end part uses FormBuilder as the example. For detailed PowerForms documentation, please check this page.
Front-end Display
Step 1. Add sections with a form to your page through the Content Builder module, as shown below:
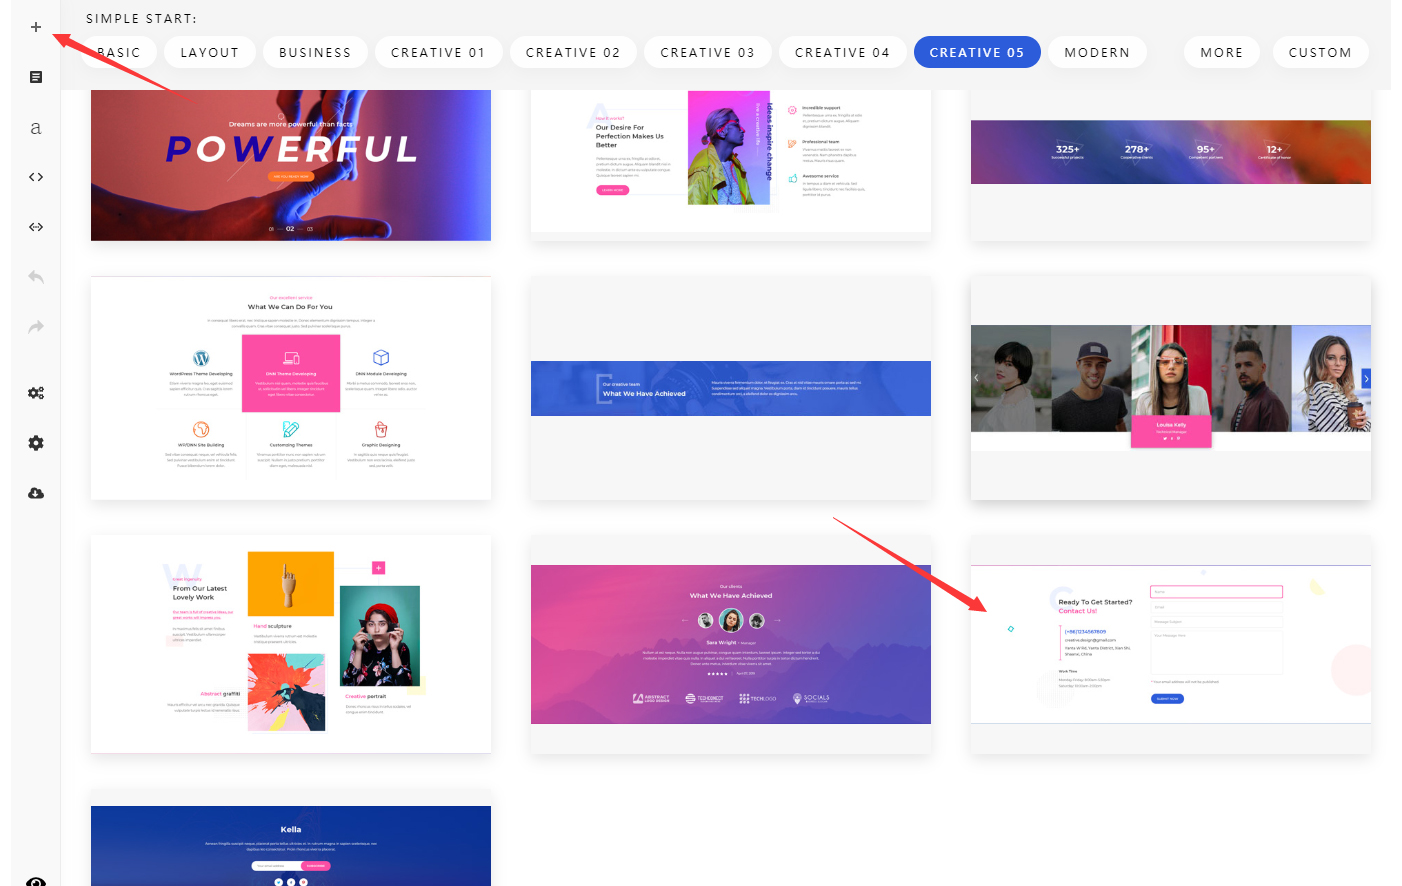
Or add a form content block for your page:
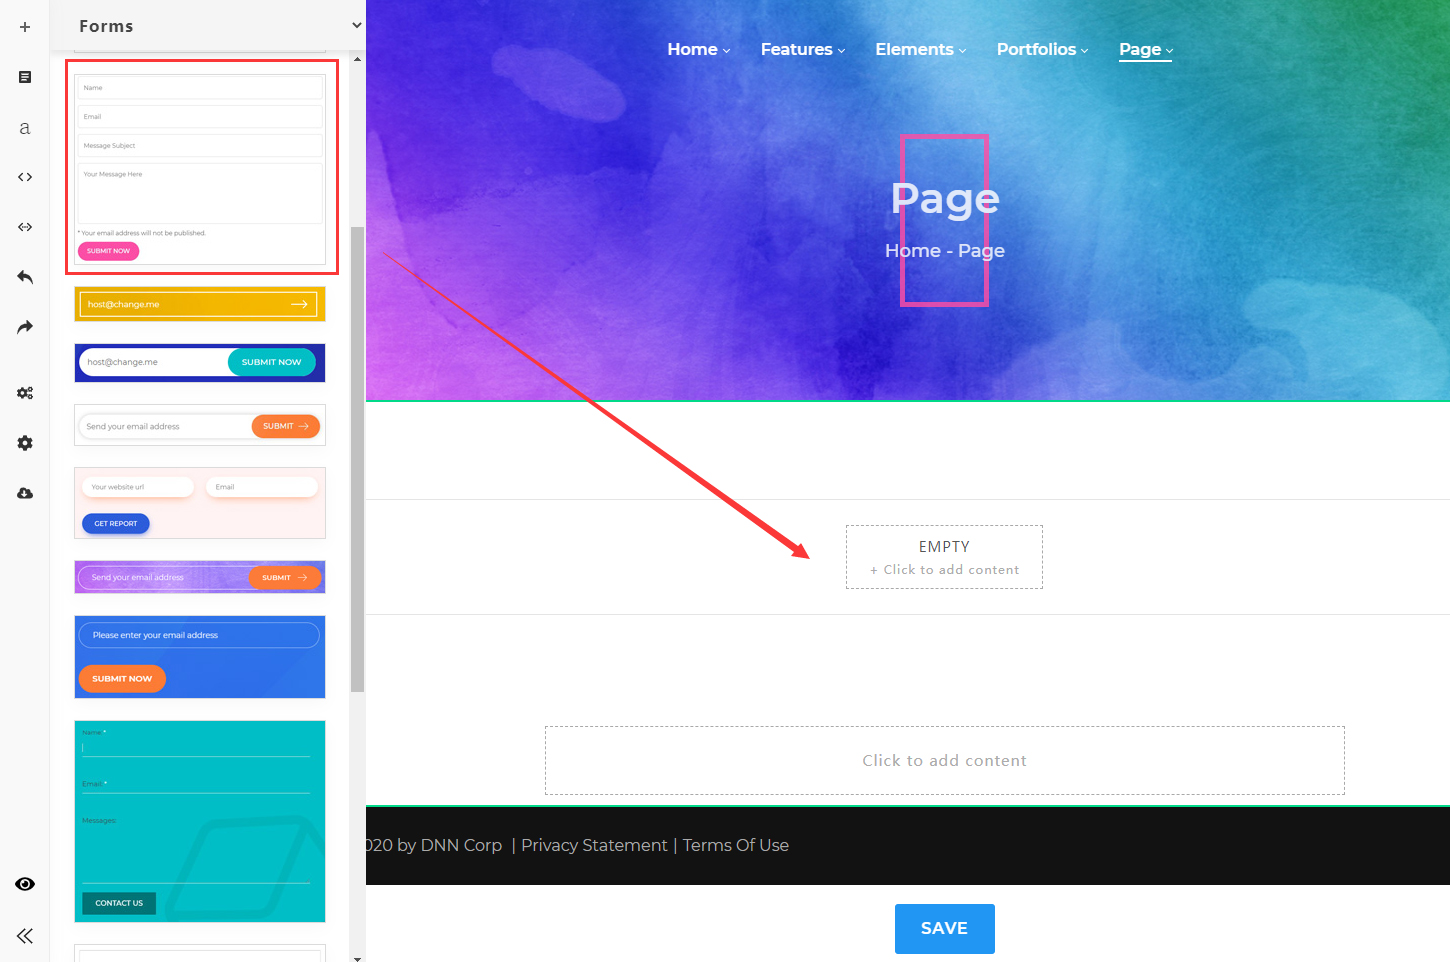
Step 2. After these steps the form still won't appear — you also need to set the form's source (as shown in the screenshot below):
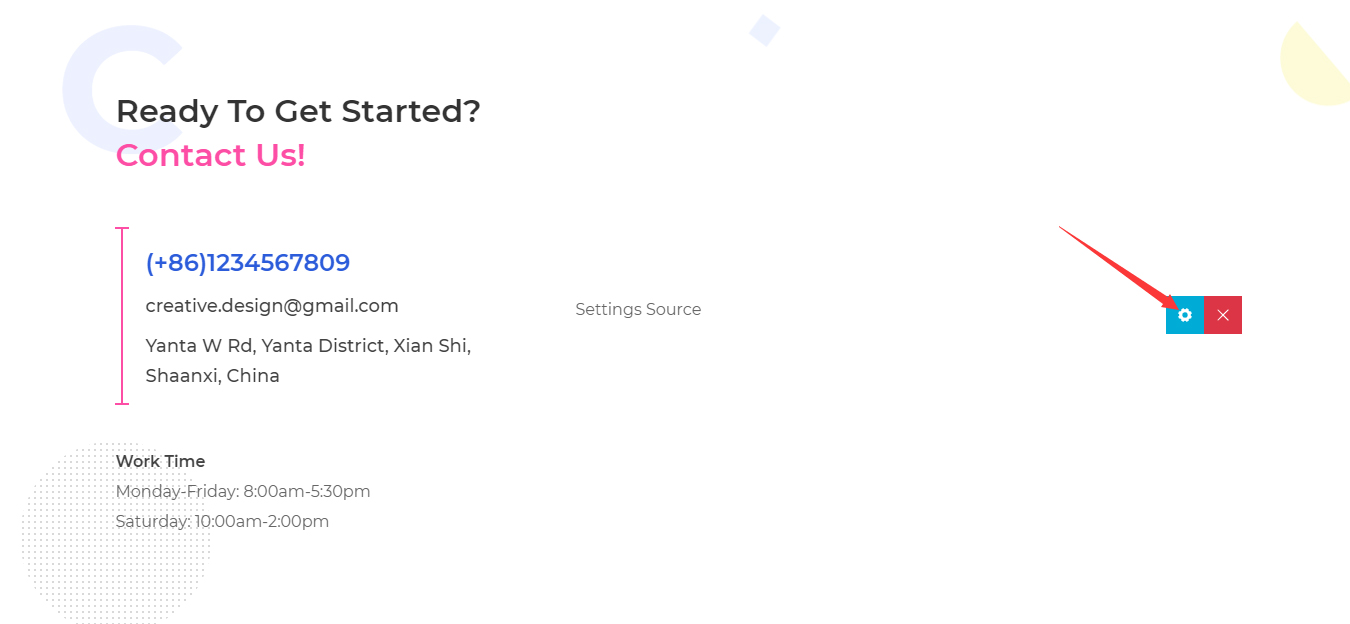
The Source list shows all form modules on the site:
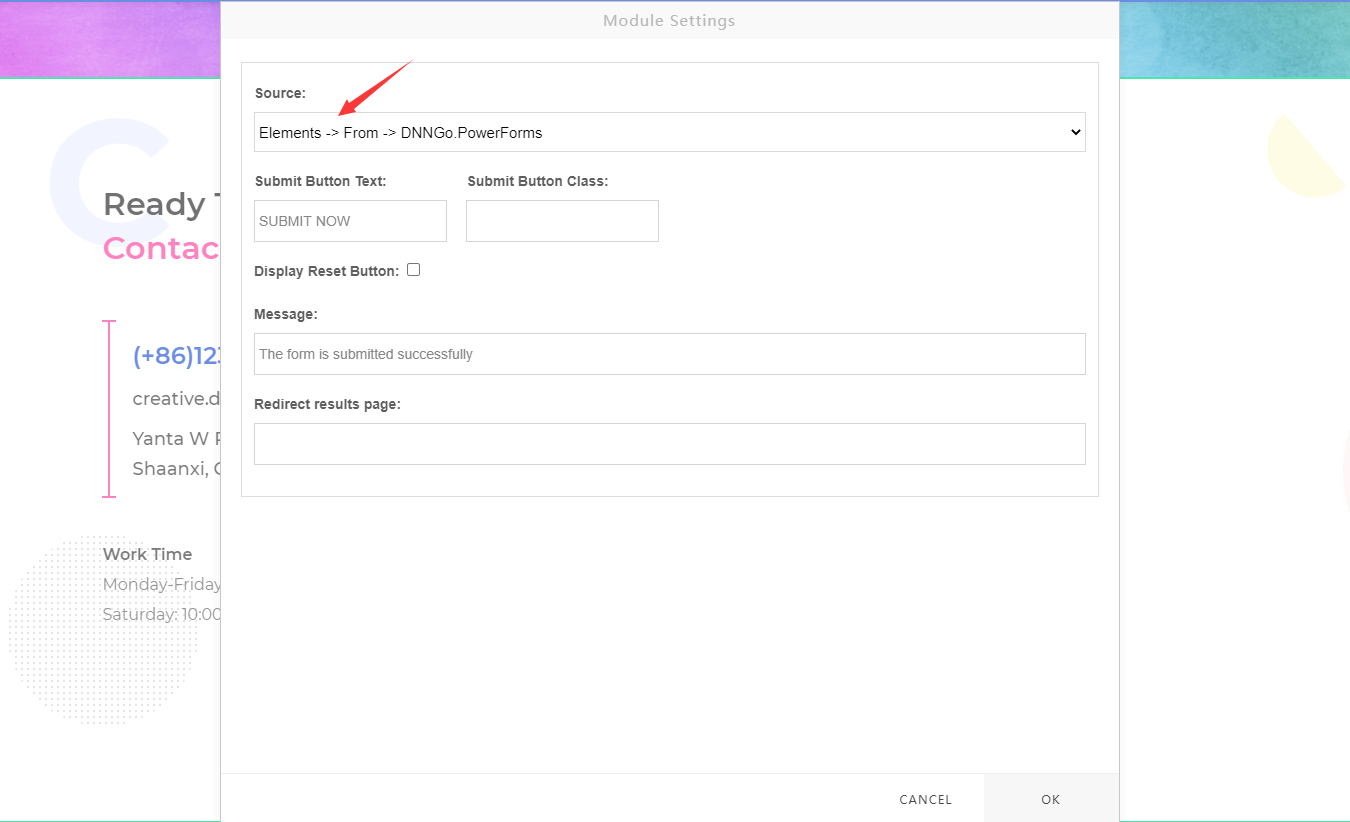
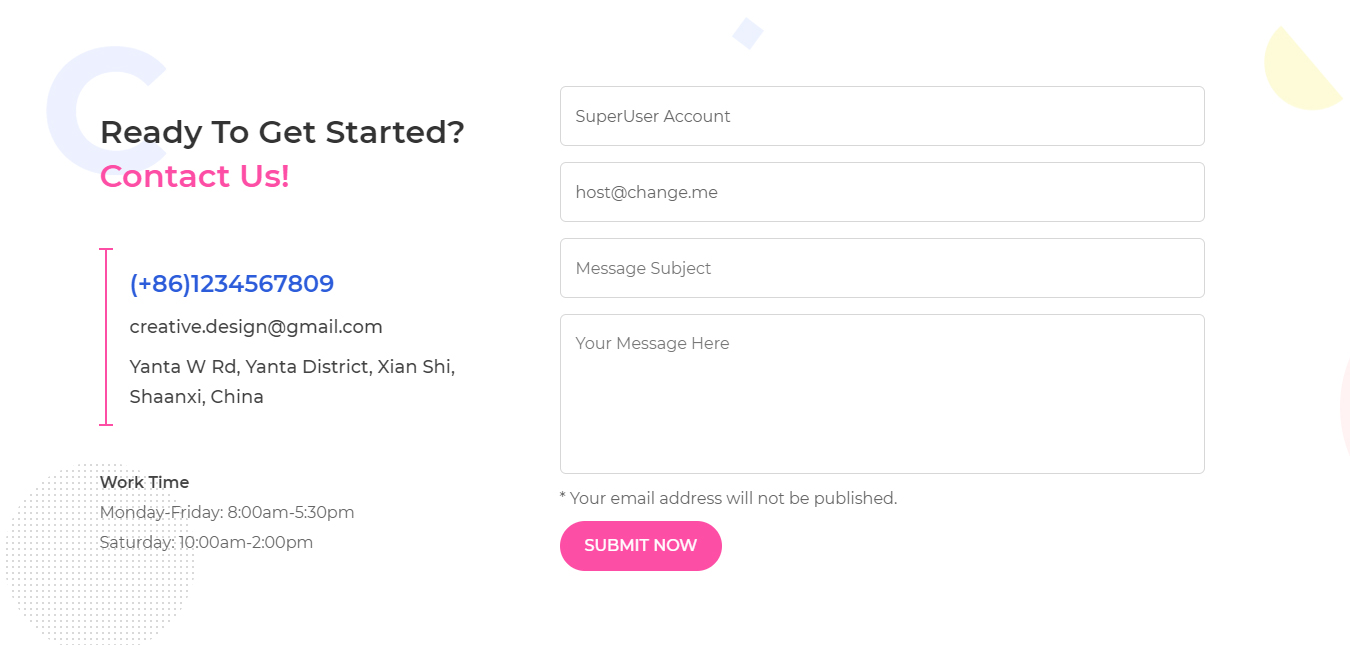
Step 3. After selecting one of the form modules, the form will display all fields of that module.
Set Up SMTP Server
You need to set up your SMTP server correctly, otherwise neither users nor admins will receive form notification emails.
Log in to your site with a superuser account, go to the Settings > Servers > Servers Settings > Smtp Server page, and correctly enter the SMTP server information (ask your email provider for it). Finally, click the Test SMTP Settings button to test whether your SMTP server is working fine.