

Installation
This guide walks you through installing DNG-Theme-Pro and its companion modules on a DNN site.
Requirements
Before installing, make sure your environment meets the following:
- DNN 9.8.0 or later
- A working, reachable DNN installation
For help installing DNN itself, see the official DNN Documentation Center.
Installation Steps
1. Raise the upload size limit
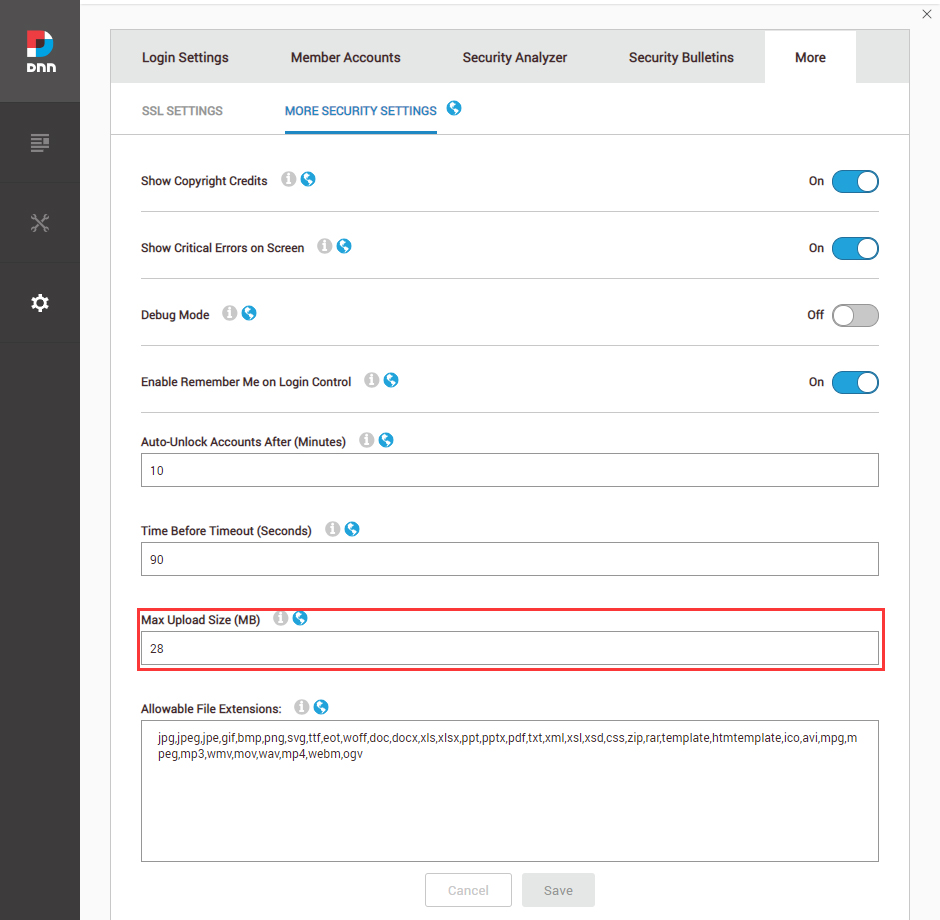
The theme and module packages are large. Log in as a superuser, go to Settings > Security > More, open the MORE SECURITY SETTINGS tab, and set Max Upload Size to 28 (MB) or higher.
2. Install the theme and modules
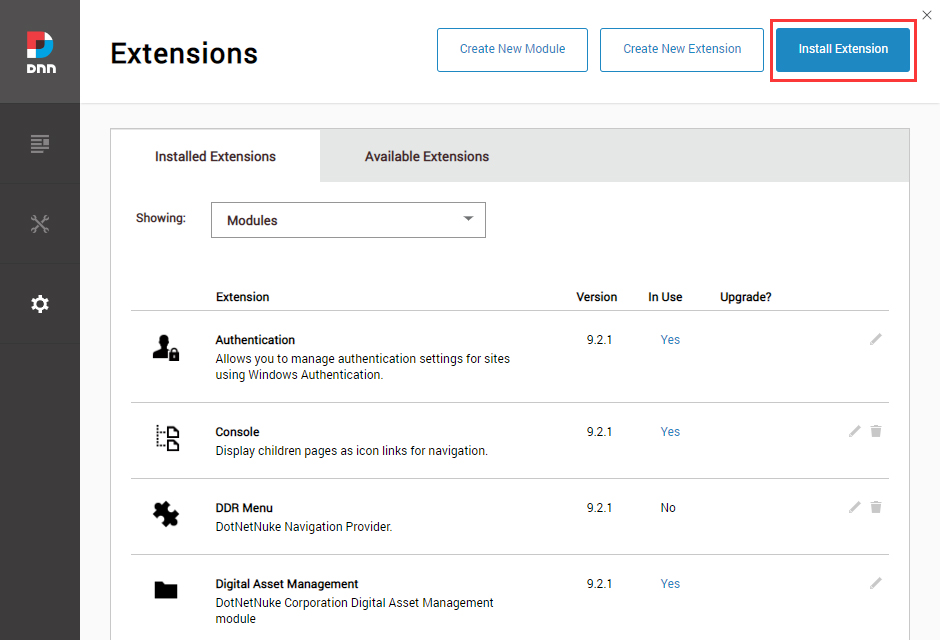
Go to Host > Extensions > Install Extension and install, in order, dng-theme-pro_x.x.x_PA.zip, DNNGo_ThemePluginPro_x.x.x_PA.zip, and all modules included in the package.
3. Apply the theme
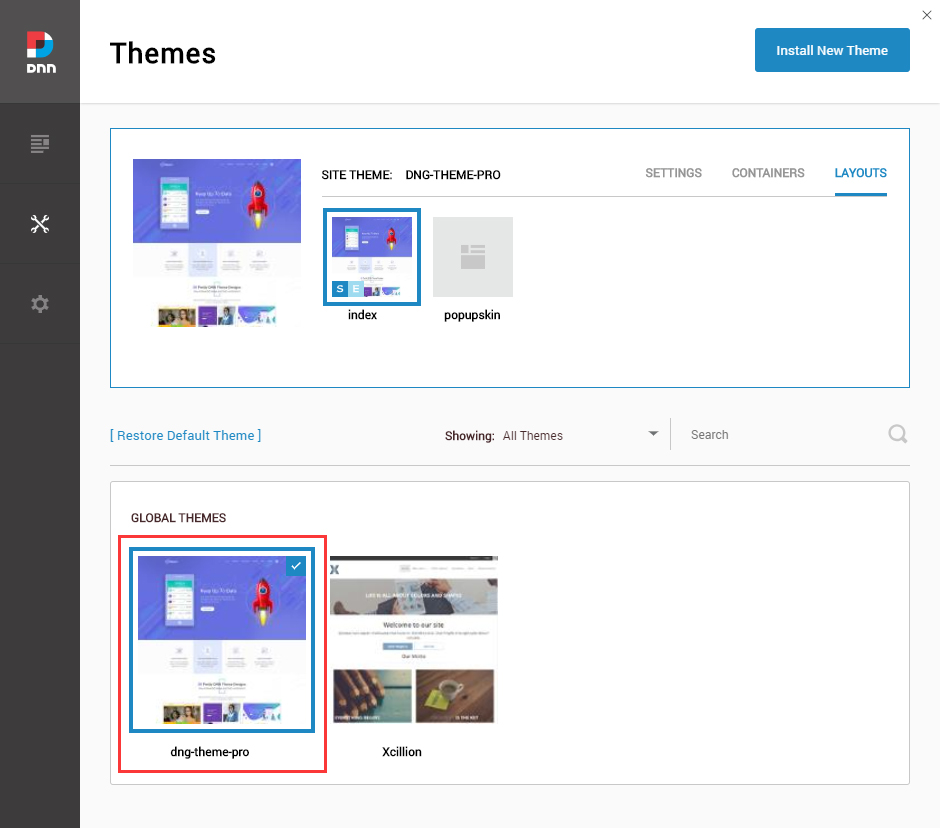
When installation finishes, go to Manage > Themes, select DNG-Theme-Pro and apply it.
4. Set the theme layout
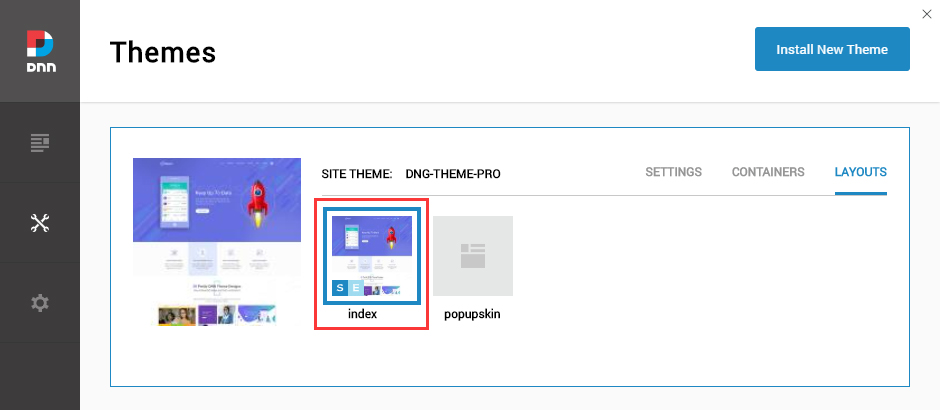
Set both Site Theme and Edit Theme to dng-theme-pro – index.
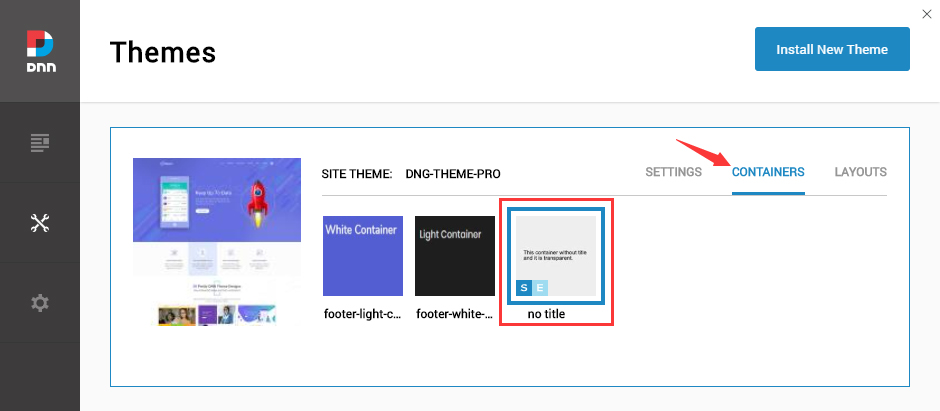
5. Set the container
Set both Site Container and Edit Container to dng-theme-pro – No Title.
Next Steps
- Getting Ready — initialize the theme and adjust the HTML editor settings
- Activation — remove the trial notice and activate the theme
Support
If you run into problems during installation, contact us at [email protected].