
Installation Guide
This guide explains how to install the Minis theme and its required modules on a DNN site. The complete process has 6 steps: adjust the upload limit → install the theme and modules → apply the theme → set the Site Theme / Container → initialize → upload resources.
System Requirements
Before installing the Minis theme, make sure your DNN environment meets the following requirements:
- DNN Platform 9.8.0 or later
- An IIS web server with an existing DNN site that is running correctly
For help installing the DNN platform itself, see the DNN official documentation center.
Installation Steps (DNN 9)
1. Adjust the Upload Size Limit
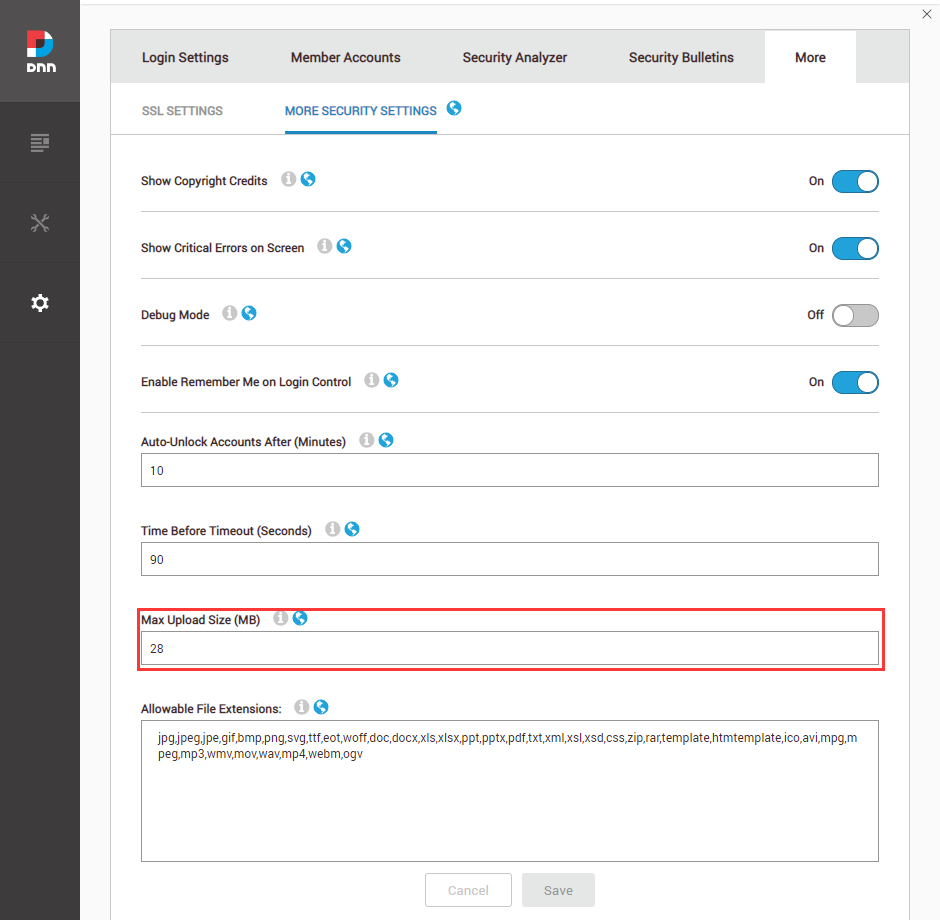
The theme and module packages are large, so increase the upload limit first:
- Log in to your site with the superuser (Host) account
- Go to Settings > Security > More
- Select the MORE SECURITY SETTINGS tab
- Change Max Upload Size to 28 (MB) or a larger value
2. Install the Theme and Modules
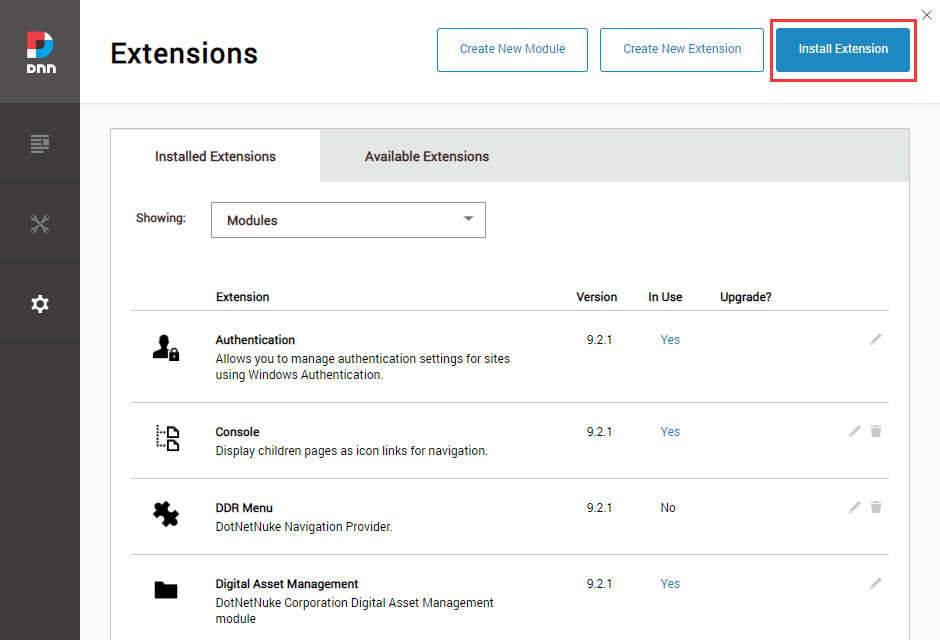
- Go to the Host > Extensions > Install Extension installation wizard
- Upload and install the following packages in order:
minis-theme_x.x.x_PA.zip(theme)DNNGo_ThemePluginPro_x.x.x.PA.zip(core plugin, install first)- The remaining modules included in the download package (LayerGallery Pro, DNNGallery Pro, FormBuilder, xBlog, xEvent — install as needed)
Install the Core Plugin First
Be sure to install DNNGo ThemePluginPro first — all other modules depend on this core plugin; otherwise, their installation will fail because the dependency is missing.
3. Apply the Theme
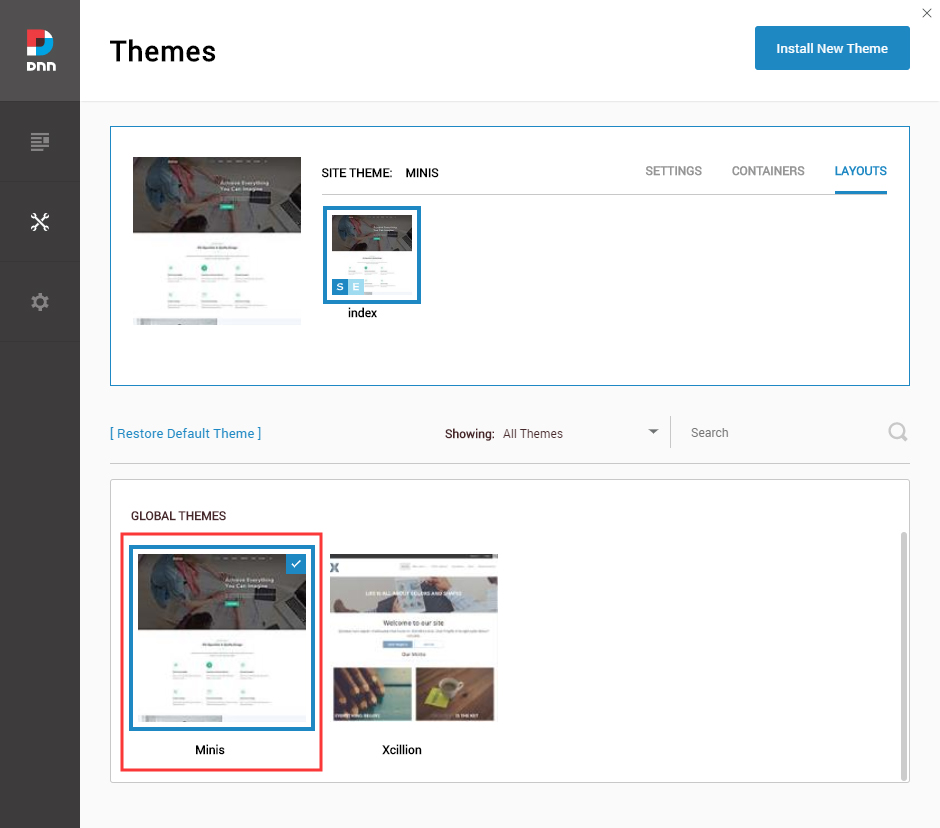
- Go to Manage > Themes
- Select and apply the minis theme
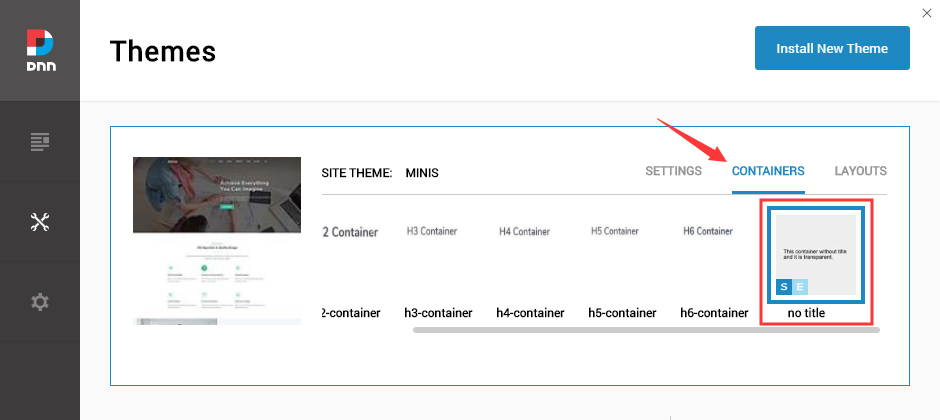
4. Set the Site Theme and Container
- Set both Site Theme and Edit Theme to minis – index
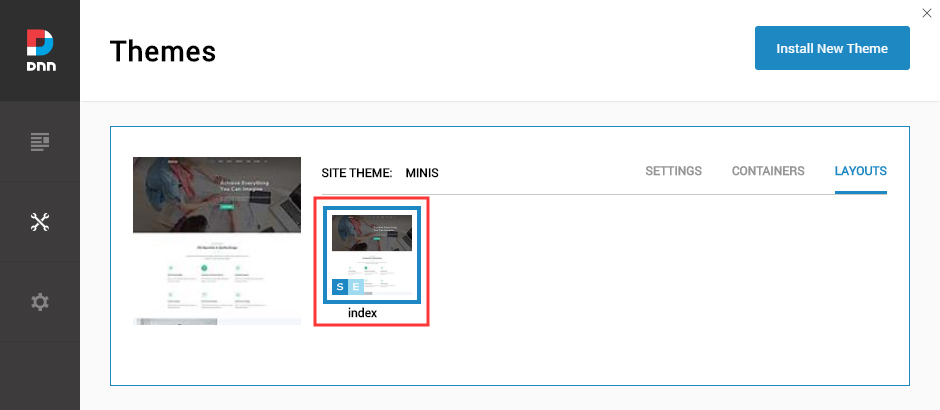
- Set both Site Container and Edit Container to minis – No Title
5. Initialize the Theme
When using the theme on a new site for the first time, you need to run the initialization once. See Preparations — Initialize the Theme.
6. Upload Resource Files
The Content Builder module comes with a large number of resource files and preset templates that must be uploaded to the server via FTP. See Preparations — Upload Resource Files.
After completing these steps, the theme is ready to use. Next, we recommend reading the Introduction to Content Builder to start building pages.
Technical Support
If you run into problems during installation, please contact: [email protected]