Creating a Slider
This page describes how to create and manage sliders and slides in LayerGalleryPro.
Creation flow
Log in to DNN with an admin account, add DNNGo LayerGalleryPro to a Pane on your page, then:
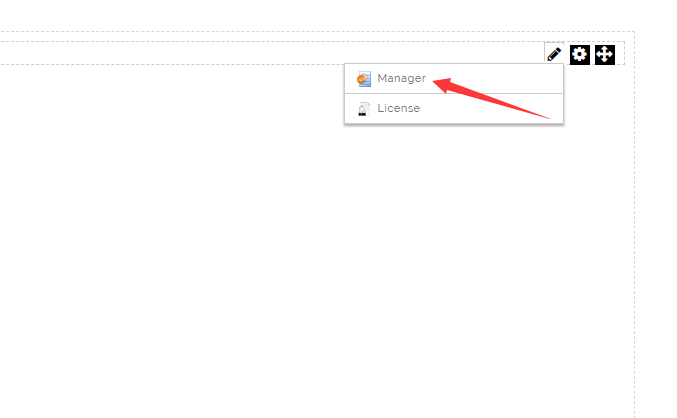
Step 1: Click the Manager button
After the module loads, click the Manager button on the page to open the management interface.
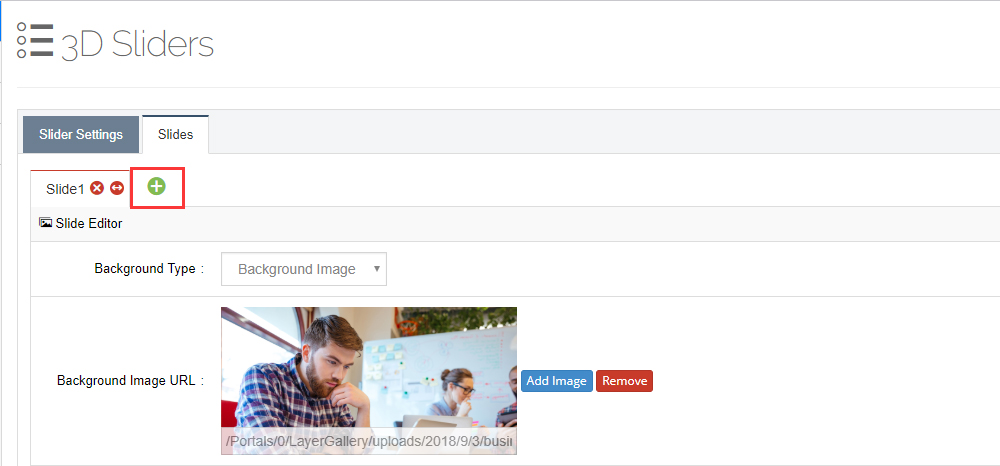
Step 2: Click the + sign to add a slide
In the content management list, click the + sign to create a new slide.
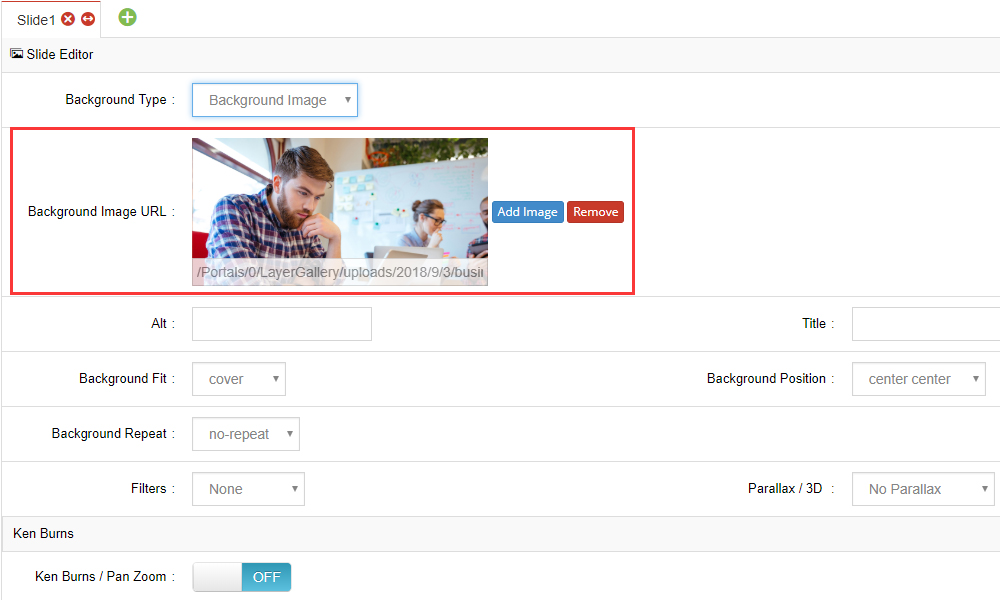
Step 3: Upload a background image
Upload a background image for the slide.
Step 4: Click the update button
Click the update button to save the slide — your first slide is done. Repeat these steps to add more slides.
Editor Structure
After clicking Manager, the top of the management interface shows the effect name (e.g. 3D Sliders), followed by two main tabs:
Slider Settings
Global parameters that apply to the whole slider, with seven sub-tabs on the left:
- Global Settings — see General
- Slide Layout — see Slider Layout
- Layout & Visual — see Layout & Visual
- Navigation Settings — see Navigation
- Parallax & 3D — see Parallax & 3D
- Scroll Effects — see Scroll Effects
- Problem Handlings — see Problem Handlings
Slides
The slide management area:
- The tab strip at the top lists each slide (Slide1, Slide2…); click the + icon to add a new slide;
- Static Layers: add layers that stay visible across all slides (e.g. a logo or a fixed button);
- Each slide's Slide Editor contains four tabs plus a copy button:
| Tab | Description | Doc |
|---|---|---|
| Main Background | Background type and parameters | Background Type |
| General Settings | Delay, state, scheduled visibility, per-device hiding, etc. | General Settings |
| Slide Animation | Transition parameters for the background | Slide Animation |
| Link & Seo | Slide link, target, custom attributes | Link & SEO |
| Copy | Duplicate the current slide in one click to quickly build similar slides | — |
When you're done, click the Update button at the bottom to save.
Managing the slide list
In the content management list (Gallery / All Items) you can:
- Add: click Add New to add slides/content items
- Edit: click the edit button in a row to modify content
- Publish/Disable: toggle the slide state — unpublished slides are excluded from the slider
- Delete: move unwanted slides to the recycle bin
- Bulk actions: publish, disable or delete multiple checked records
Prepare assets
If your images are not uploaded yet, upload and manage them first in the Media Library, then select them when editing slides.
Switching animation effects
The current 2.x version is built around the 3D Sliders effect, and all slider parameters are configured in the effect-name tab at the top of the management interface (the sub-tabs of "Slider Settings" described above). Earlier versions switched between multiple animation effects via the Effect List page and installed additional effect themes through Effects → Install theme; if you are using a multi-effect build, those entries are still available in the management menu.
Trial limitation
The trial version is limited to a single effect. The full version includes more animated effects, and we regularly add new effects as free updates.
Next Steps
- Background Type — configure slide backgrounds
- General Settings — set slide behavior parameters
- Slide Layers — add text, images, videos and buttons